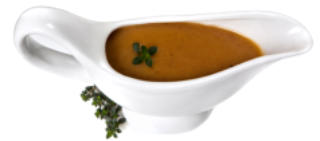

Homemade Pan Gravy for Turkey or Chicken
Home | Indian Recipes | Thai Recipes | Main Dishes | Desserts | Leave a Comment | Recipes by Email | About
Copyright © Suzanne’s Recipe File | Privacy Policy

►Home- All Recipes
►Side Dish
Recipes
►Potato Salad
►Mushroom Tart -
Galette
►Cole Slaw
►Roasted
Vegetables
►Roasted Brussels
Sprouts
►Roasted Grapes
and Sausage
►Baked Rice with
Pomegranate
Relish
►Corn Pudding
►Corn Bread
►Bagels
►Parsnip Puree
►Mashed Potatoes
►Sweet Potato
Casserole
►Mashed Cauliflower
►Baked Potatoes
►Glazed Carrots
►Cranberry Sauce
►Irish Soda Bread
►Sauteed Squash
►Green Bean
Casserole
►Gravy
►Stuffing
►Leave a Comment
►Get Recipes by
Email
I have tried a lot of gravy recipes, including my mother’s, and I was never able to get any of them to
work. My gravy was always tasteless or lumpy or both.
There is nothing worse than bad gravy,
and it can feel like a real disaster when
gravy goes wrong. I think that most gravy
recipes leave a lot out of the picture so here
I have written the longest homemade gravy
recipe ever! Over many years I have tried
many times to improve it and now I think I
am happy with the results.
Homemade pan gravy is based on using the flavorful pan drippings from roasted meat that
you have just cooked, with flour and water added. There are lots of other things you may add to
gravy and I will talk about them here.
I have never had any luck with gravy recipes that call for a few tablespoons of drippings and
a specific amount of flour and water. I think the right quantity to use depends on the fat content
of the drippings and I don’t know a way to measure that. Some say you can chill the drippings
and then skim off the congealed fat but I don’t have time for that when I’ve just taken a turkey out
of the oven. The fat content in the drippings can really vary because the drippings’ water content
can be really different between a fresh or a frozen bird or even between brands of frozen birds.
So what I do is make the gravy by eye, on the fly. With practice I have been able to make
good gravy every time. Here I will talk about how I keep an eye on my gravy as it cooks and
hopefully you may be able to adapt my methods in your kitchen.
Ingredients:
Roasting pan with drippings from the turkey, chicken or beef that you just roasted
3-6 cups flour, depending on size; 3 cups for a 4 pound chicken, 6+ cups for
a 20 pound turkey
Water
Instant mashed potato flakes (only if you are not cooking the giblets, see below)
Salt & pepper to taste
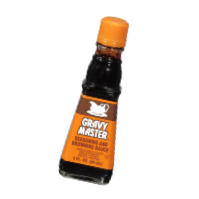
Gravy Master, Kitchen Bouquet or other gravy coloring agent (see photo)
Optional:
Chicken or turkey giblets
1-2 onions, peeled & chopped
1-2 carrots, peeled & chopped
1-2 stalks celery, washed & chopped
1 bay leaf
Rosemary, or thyme to taste
If you are going to make giblet gravy, start by filling a 2-3 quart pot with water and adding the
heart, neck and gizzard of the turkey or chicken. Add the optional onion, carrot, celery and bay leaf at
this point if you like. I think they make a difference, but if I want to take a shortcut I omit them. Simmer
all this for a couple of hours on low heat. Reserve the liver out until the last 15 minutes of cooking since
the liver overcooks really fast. When done, discard the bay leaf and the neck and chop fine all the
giblets. Strain out the onion, carrot and celery and reserve them aside along with the chopped giblets.
Important: Save the giblet water from this step because it has a lot of flavor and is used for the next
steps in making the gravy. If you choose to skip cooking the giblets then we will make a substitution for
all of this later.
The biggest fault that novice gravy makers make is lumps in the gravy made of undissolved flour.
Here is how I minimize the chances for lumpy gravy.
Place all of the flour in a separate bowl, then add a very small amount of water, then stir with a large
flat spatula. Continue to add more water until the flour starts to cling together and resemble hard dough.
The reason why a lot of recipes tell you to add the water slowly is because you are using the still grainy
texture of the flour to help grind the lumps out of itself. That’s a good reason! If you add too much water
to fast then the flour mixture will get soupy and it will be impossible to chase those lumps around the
bowl and flatten them. Use the flat side of the spatula to press out lumps on the sides of the bowl while
you keep adding water slowly. This takes a while – be patient. When you are confident that you have
removed all the lumps then add just enough water and stir it to make the mixture the consistency of
pancake batter or very thick soup. Set aside.
All the above needs to be finished before the turkey or chicken or beef comes out of the oven.
When the roast is done, take it out of the oven and remove the meat to the carving plate. Most roasts
are easier to carve when they are out of the oven for 10-15 minutes so you have time to make the gravy.
Scrape out and discard the largest bits of roast from the bottom of the pan. Then if there is more
than ½ inch of drippings in the pan then you had roast with a really high water content and you should
remove and discard enough drippings to bring the level of drippings in the pan to just less than ½ inch. If
you have very little drippings that’s ok.
Place the roasting pan containing the drippings on top of the stove and place on high heat.
Immediately add some of the giblet water from the first step to the roasting pan. Add all of the water if
you are cooking a big turkey, add about half of the water if you have very little drippings. If you are not
using giblet water then use the leftover water from making mashed potatoes, or else use plain water with
¼ to ¾ cup of instant potato flakes added. Also add the cut up giblets if you have them and stir to
combine.
Bring all this to a boil in the roasting pan – be careful because the handles and the pan will get hot!
Now here is a tricky part. Find a cooler side of the roasting pan and begin to pour in very slowly some of
the flour and water mixture. Stir constantly while you do this. I use two hands, one to pour the mixture
and one to keep stirring. It is a good balancing act, but not impossible.
This is a big chance for creating flour lumps in the gravy so take care. If the flour and water mixture
hits hot water without any stirring then cooked flour lumps will form instantly. If a few lumps form, that’s
ok, you can strain the gravy later.
After slowly pouring in some of the flour and water mixture, continue stirring and let the flour cook
and “rise” in the gravy. After a few minutes the flour will thicken the gravy. At this point it is time to cook
by eye and let your senses tell you what to add next:
1. If the gravy seems too thick, add a little more water. Too much flour can give the gravy a burnt
flour taste.
2. If the gravy seems too thin, add more of the flour & water mixture. Keep on stirring!
3. Stop stirring for a moment. If a large puddle or sheen of fat appears on the top of the gravy,
there was a lot of fat in the drippings. Compensate by adding more water, then flour &
water mixture. If that does not help, try skimming the fat sheen off the surface of the gravy
to prevent it from being too greasy.
When you are happy with your gravy, add plenty of salt and pepper to taste, plus the optional
rosemary or thyme. You will notice that your gravy has a pale non-gravy color. Just shake in and stir
some of the Gravy Master coloring agent a little at a time until you get the color you want. At this point if
you have too many lumps in the gravy you should strain through a wire mesh strainer. Add back the
chopped giblets, onion, carrot & celery at this point if you decide to keep them all in your gravy. Pour
some gravy into your gravy boat or other serving vessel and keep the rest in the pan to keep warm.
Again, I am sorry that I am not being quite exact on quantities. But so far my approach to making
gravy by eye seems to work for me. I hope it works for you too.
Whew! This seems like a lot, but time really goes fast at this stage of a big holiday dinner. By the
time the gravy is all done, the turkey, chicken or beef will be ready for carving and not too cold.
Hopefully you will have all your other dishes done at just the right time so everything will be at the right
temperature and ready to eat. Mashed potatoes and stuffing can be made earlier and will keep warm
very well without overcooking. Vegetables will need to be cooked right when you are making the gravy
because they overcook easily and cool very quickly. Cranberry sauce needs to be taken out of the
refrigerator at the last minute so that it is well chilled. Timing is everything!
Now eat and enjoy your holiday dinner and marvel at how the preparation took you hours and the
eating took you five minutes.


- Roasted Vegetables
- Potato Salad
- Bagels
- Mushroom Tart
- Cole Slaw
- Mashed Potatoes
- Sweet Potato Casserole
- Roasted Brussels Sprouts
- Roasted Grapes and Sausage
- Parsnip Puree
- Mashed Cauliflower
- Baked Potato
- Gravy
- Baked Rice with Pomegranate Relish
- Honey Glazed Carrots
- Stuffing
- Corn Pudding
- Corn Bread
- Cranberry Sauce
- Irish Soda Bread
- Sautéed Squash
- Green Bean Casserole